Arduino UNO + Arduino CNC Shield V3.0+A4988 使用指南
Overview
CNC Shield V3.0可用作雕刻机,3D打印机等的驱动扩展板,板上一共有4路步进电机驱动模块的插槽,可驱动4路不进电机,而每一路步进电机都只需要2个IO口,也就是说,6个IO口就可以很好的管理3个步进电机,使用起来非常的方便,告别传统步进电机操作繁琐。将Arduino CNC Shield V3.0插到Arduino UNO上,并且安装GRBL固件就可以快速DIY一台CNC雕刻机出来。

Board Layout
下图显示了GRBL使用的Arduino引脚的功能
GRBL Pin Layout:
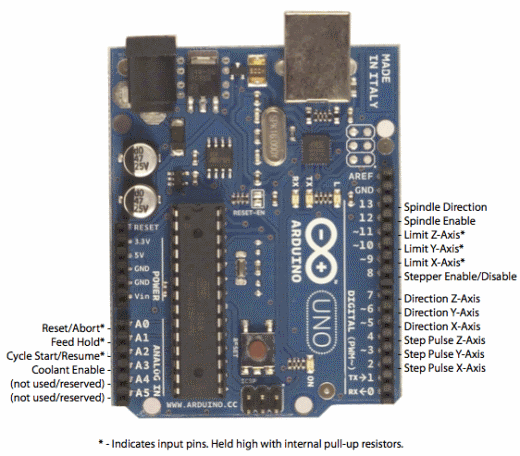
GRBL Pin Layout
Arduino CNC Shield V3.0除了拥有GRBL所有功能引脚外,还设计了一些额外引脚,实现更多功能。其原理图如下图所示:


Extra pins:
- Limit switch pins have been doubled up so that each axis has a “Top/+” and “Bottom/-“. This makes it easier to install two limit switches for each axis. (For use with a normally open switch)
- EStop – These pins can be connected to an emergency stop switch. This does the same as the RESET button on the Arduino board. (We do advice that an extra emergency button also be installed that cuts power to all machinery. A REAL EMERGENCY BUTTON)
- Spindle and coolant control has their own pins.
- External GRBL Command Pins have been broken out allowing you to add buttons for Pause/Hold , Resume and Abort.
- Serial Pins (D0-1) and I2C Pins (A4-5) have their own break out pins for future extensions. I2C can later be implemented by software to control things like spindle speed or heat control.
- Version 3.00 of the board added a jumpers to configure the 4th axis(Clone the other axis’s or run from Pin D12-13), Comms Header(RX+TX , I2C) and a Stepper Control Header(All Pins needed to run 4 steppers)
Hardware installation
根据实际情况连接各组件,例如电机、限位开关、激光器、电机驱动器等。
在进行硬件安装过程需要注意一下几点:
1)电源的正负极切勿接反了,否则会烧坏你的设备,甚至发生火灾
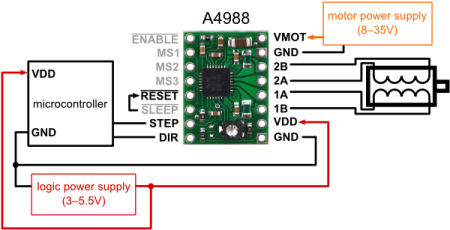
2)电机驱动器的方向切记不要插反,否则会烧毁主板和驱动器,具体安装方向请参照驱动器数据手册并结合Arduino CNC Shield V3.0确定,本文以A4988作为电机驱动,其与Arduino CNC Shield V3.0连接方向如图所示

A4988支持全细分、1/2细分、1/4细分、1/8细分、1/16细分。每种细分方式通过Arduino CNC Shield V3.0的三个排针M0、M1、M2来设置,跳线帽盖到排针上代表高电平,不盖代表低电平。为了提高雕刻的精确度,采用16细分,需要用三个跳线帽将M0、M1、M2都盖上。如图

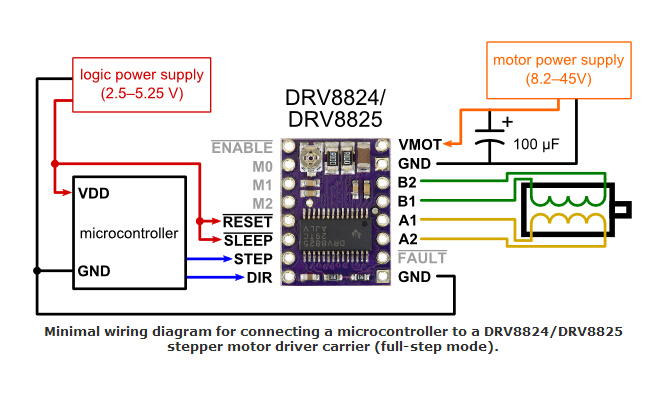
3) Arduino CNC Shield V3.0的输入电压是DC 12V-36V,不要输入高于36V的电压。虽然输入电压允许最高36V,不意味着什么情况下都可以用36V,因为有些电机驱动器的供电电压(VMOT)低于36V,例如A4988,它的供电电压是8-35V,如果此时使用36V供电的话就会烧坏驱动器。所以在选择电源的时候要查看对应电器驱动器的数据手册。下面列举几种常用的驱动器供电电压参数。
A4988
DRV8824/DRV8825
TMC2100

Software installation
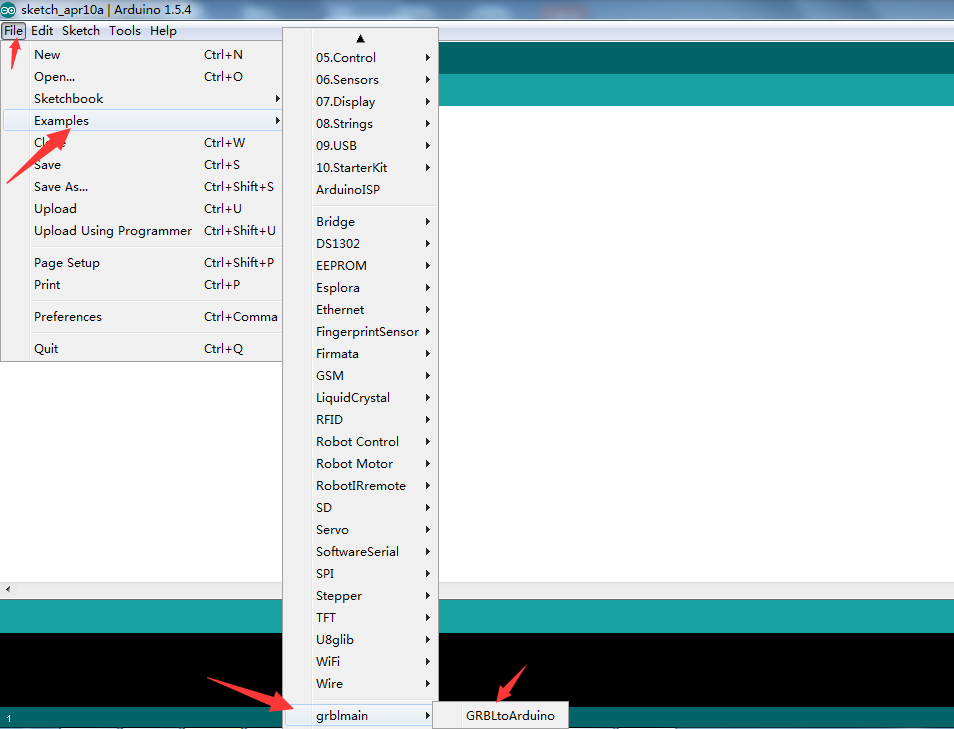
1) 安装grblmain库文件并烧录程序
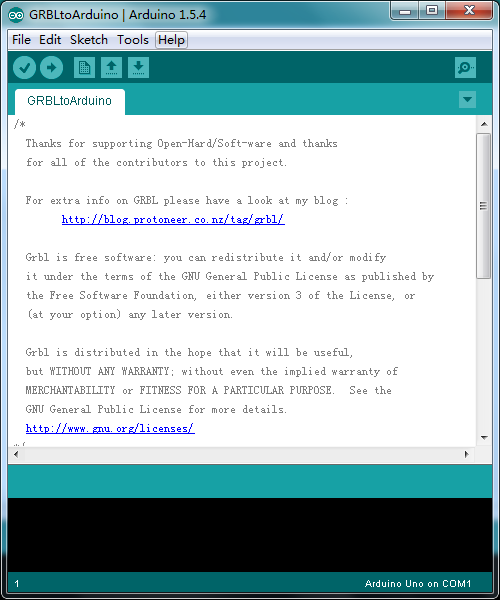
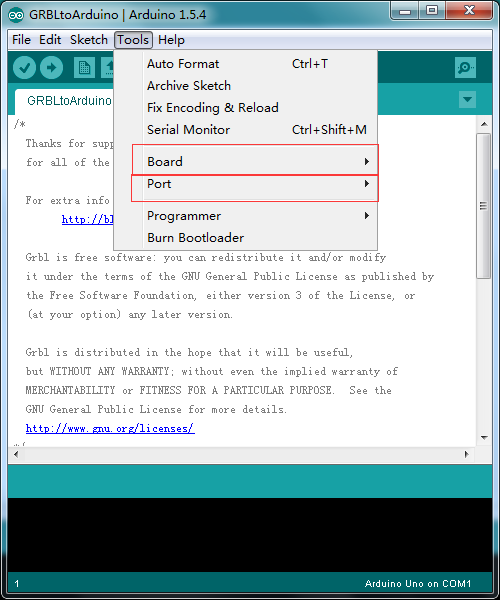
将grblmain.zip下载并解压后放到Arduino IDE安装目录下的libraries文件夹下,打开Arduino IDE,选择File->Examples->grblmain->GRBLtoArduino会打开一个grbl的示例程序,选择好端口号和板卡型号,将此示例程序烧录到Arduino UNO中。
2) 安装Grbl Controller软件
下载Grbl Controller软件,解压并安装,打开Grbl Controller软件,界面如图所示

用USB线一端接在PC上,一端插在Arduino UNO 的USB口上,选择好端口号,将波特率选择为9600,点击”Open”连接,如果连接上板子”Open”会变成“Close/Reset”,背景为红色。点击”Choose File”选择你要雕刻的文板,选择好后就可以点击”Begin”开始雕刻了。